Installation Instructions
- Install Flush valve per flush valve manufacturer’s recommendations or if previously installed verify it is installed per flush valve manufacturer’s recommendations.
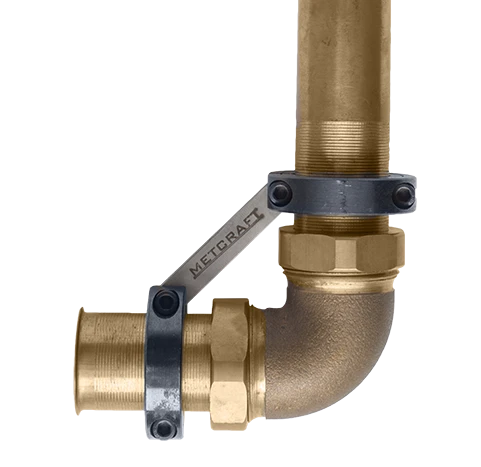
- Familiarize yourself with the Flush Valve Pipe Stabilizer installation drawing and how parts are assembled before proceeding with installation.
- Using a 3/16″ Allen wrench remove cap screws from collars and brace.
- Put two halves of a collar on either the horizontal or the vertical flush pipe tube and insert a cap screw through the hole opposite from where the brace would go and loosely thread the cap screw in.
- In the opposite hole insert one end of the brace and loosely thread the other cap screw in place.
- Using the previous method connecting the remaining collar to the other pipe, leaving cap screws loose.
- Adjust collars and brace where they resemble the image. Make sure brace doesn’t interfere with compression nut on flush valve elbow in case it must be tightened in the future.
- Using the 3/16″ Allen wrench tighten the cap screws to 80 in-lbs. at the brace first then the outer screws.
- After a short period of use check cap screws for tightness.