Installation Instructions
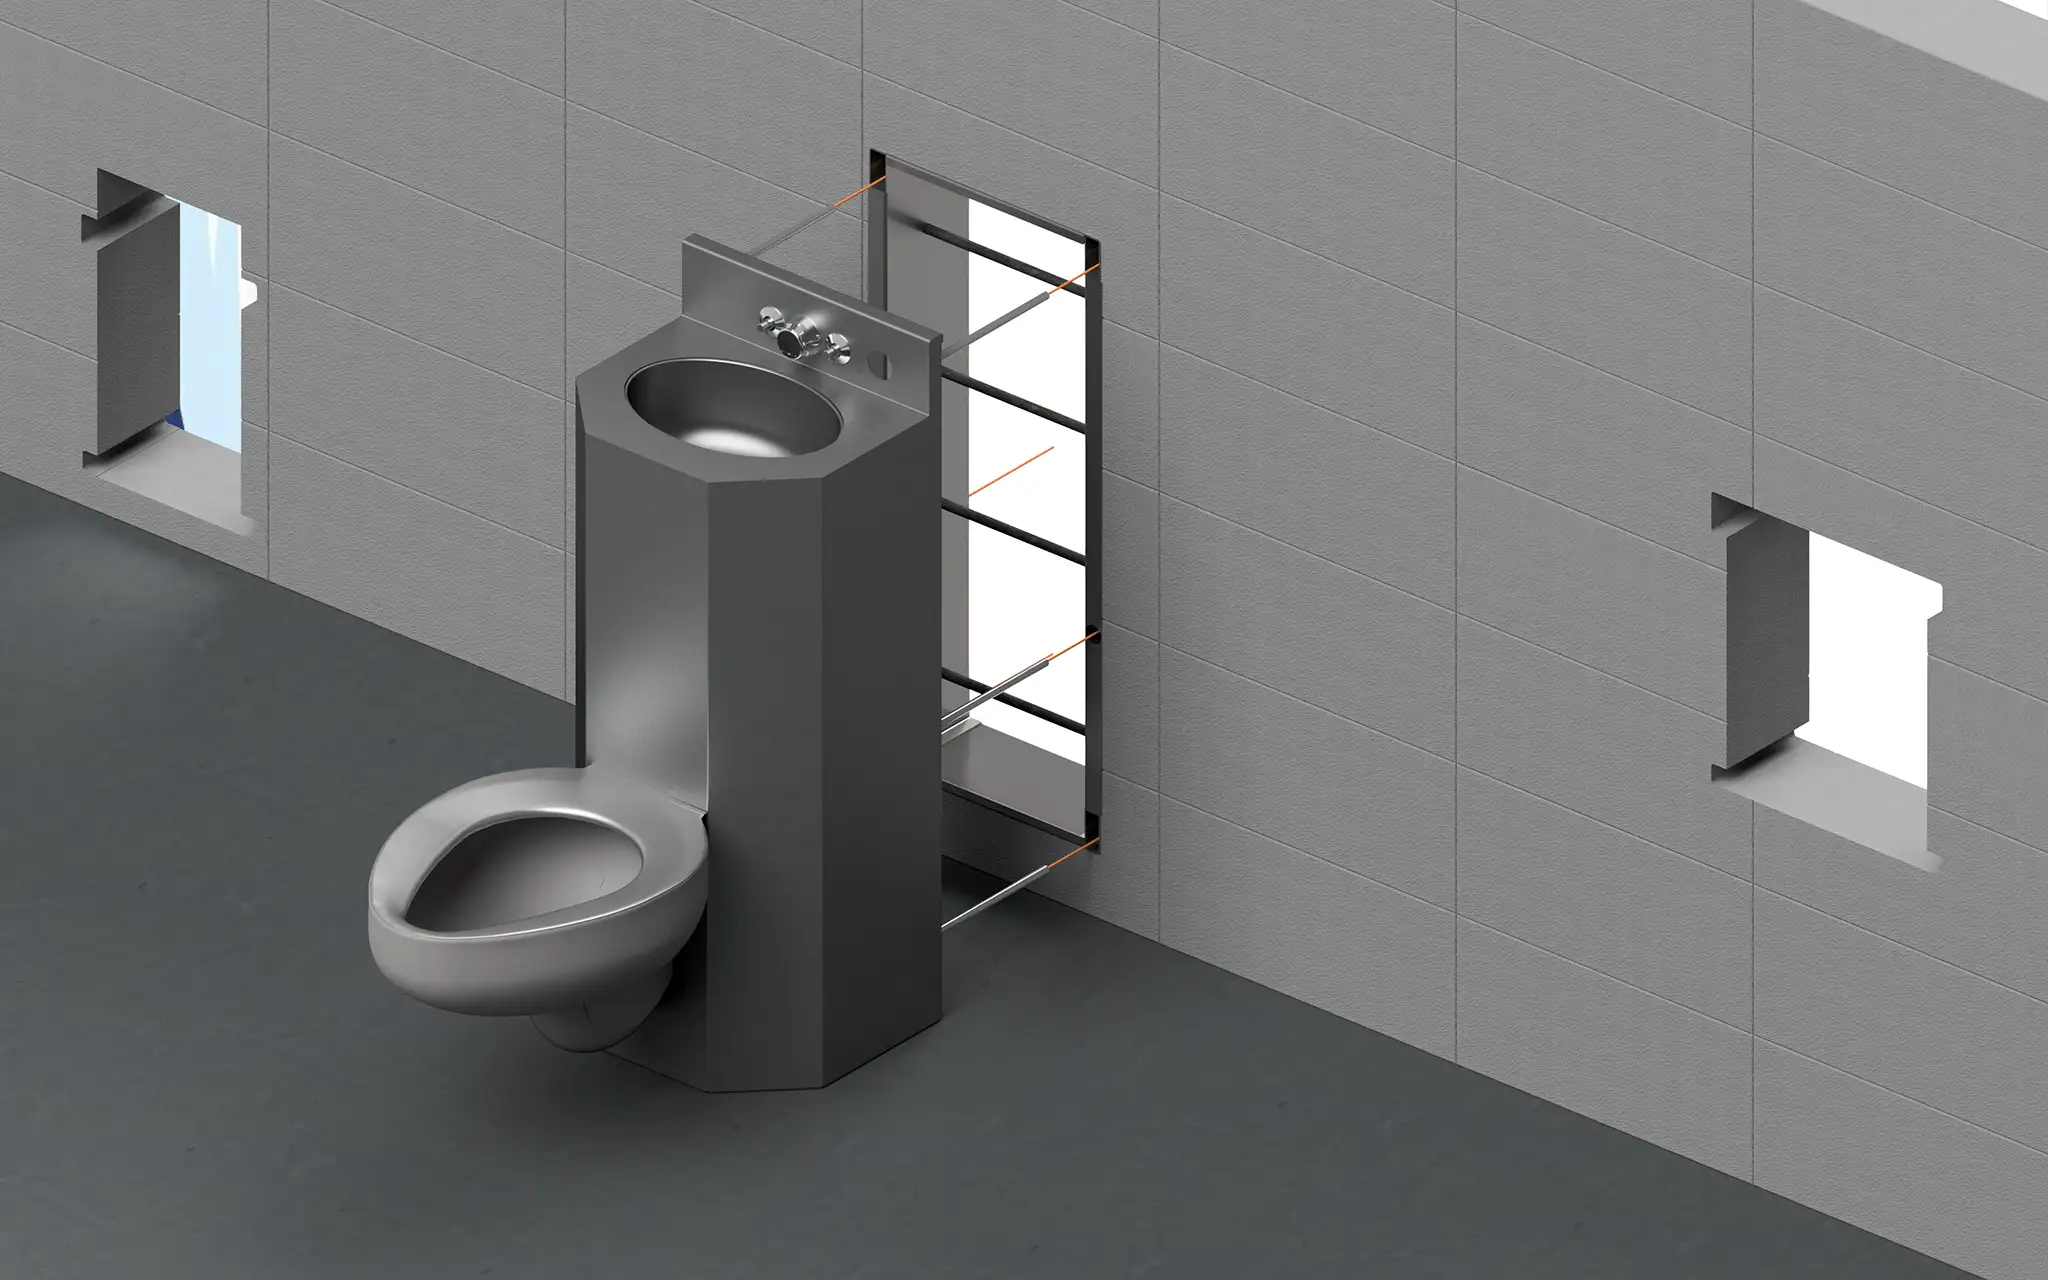
Locate rough-in position on wall. If a Metcraft security frame is to be incorporated, check to make sure frame is square and has not been damaged in shipment. If the frame is out of square, mounting holes will not match fixture anchor locations.
- If using a security frame, cast the frame in place or block in place by conventional construction methods. You will notice the frames have “v” notches on the front and back face. These are used to locate and center the frame in your wall. Please refer to the installation guide for your fixture for more details.
- If core drilling or using steel plate walls, refer to the submittal drawing for all required holes and wall openings.
- Rough-in all plumbing connections required by fixture.
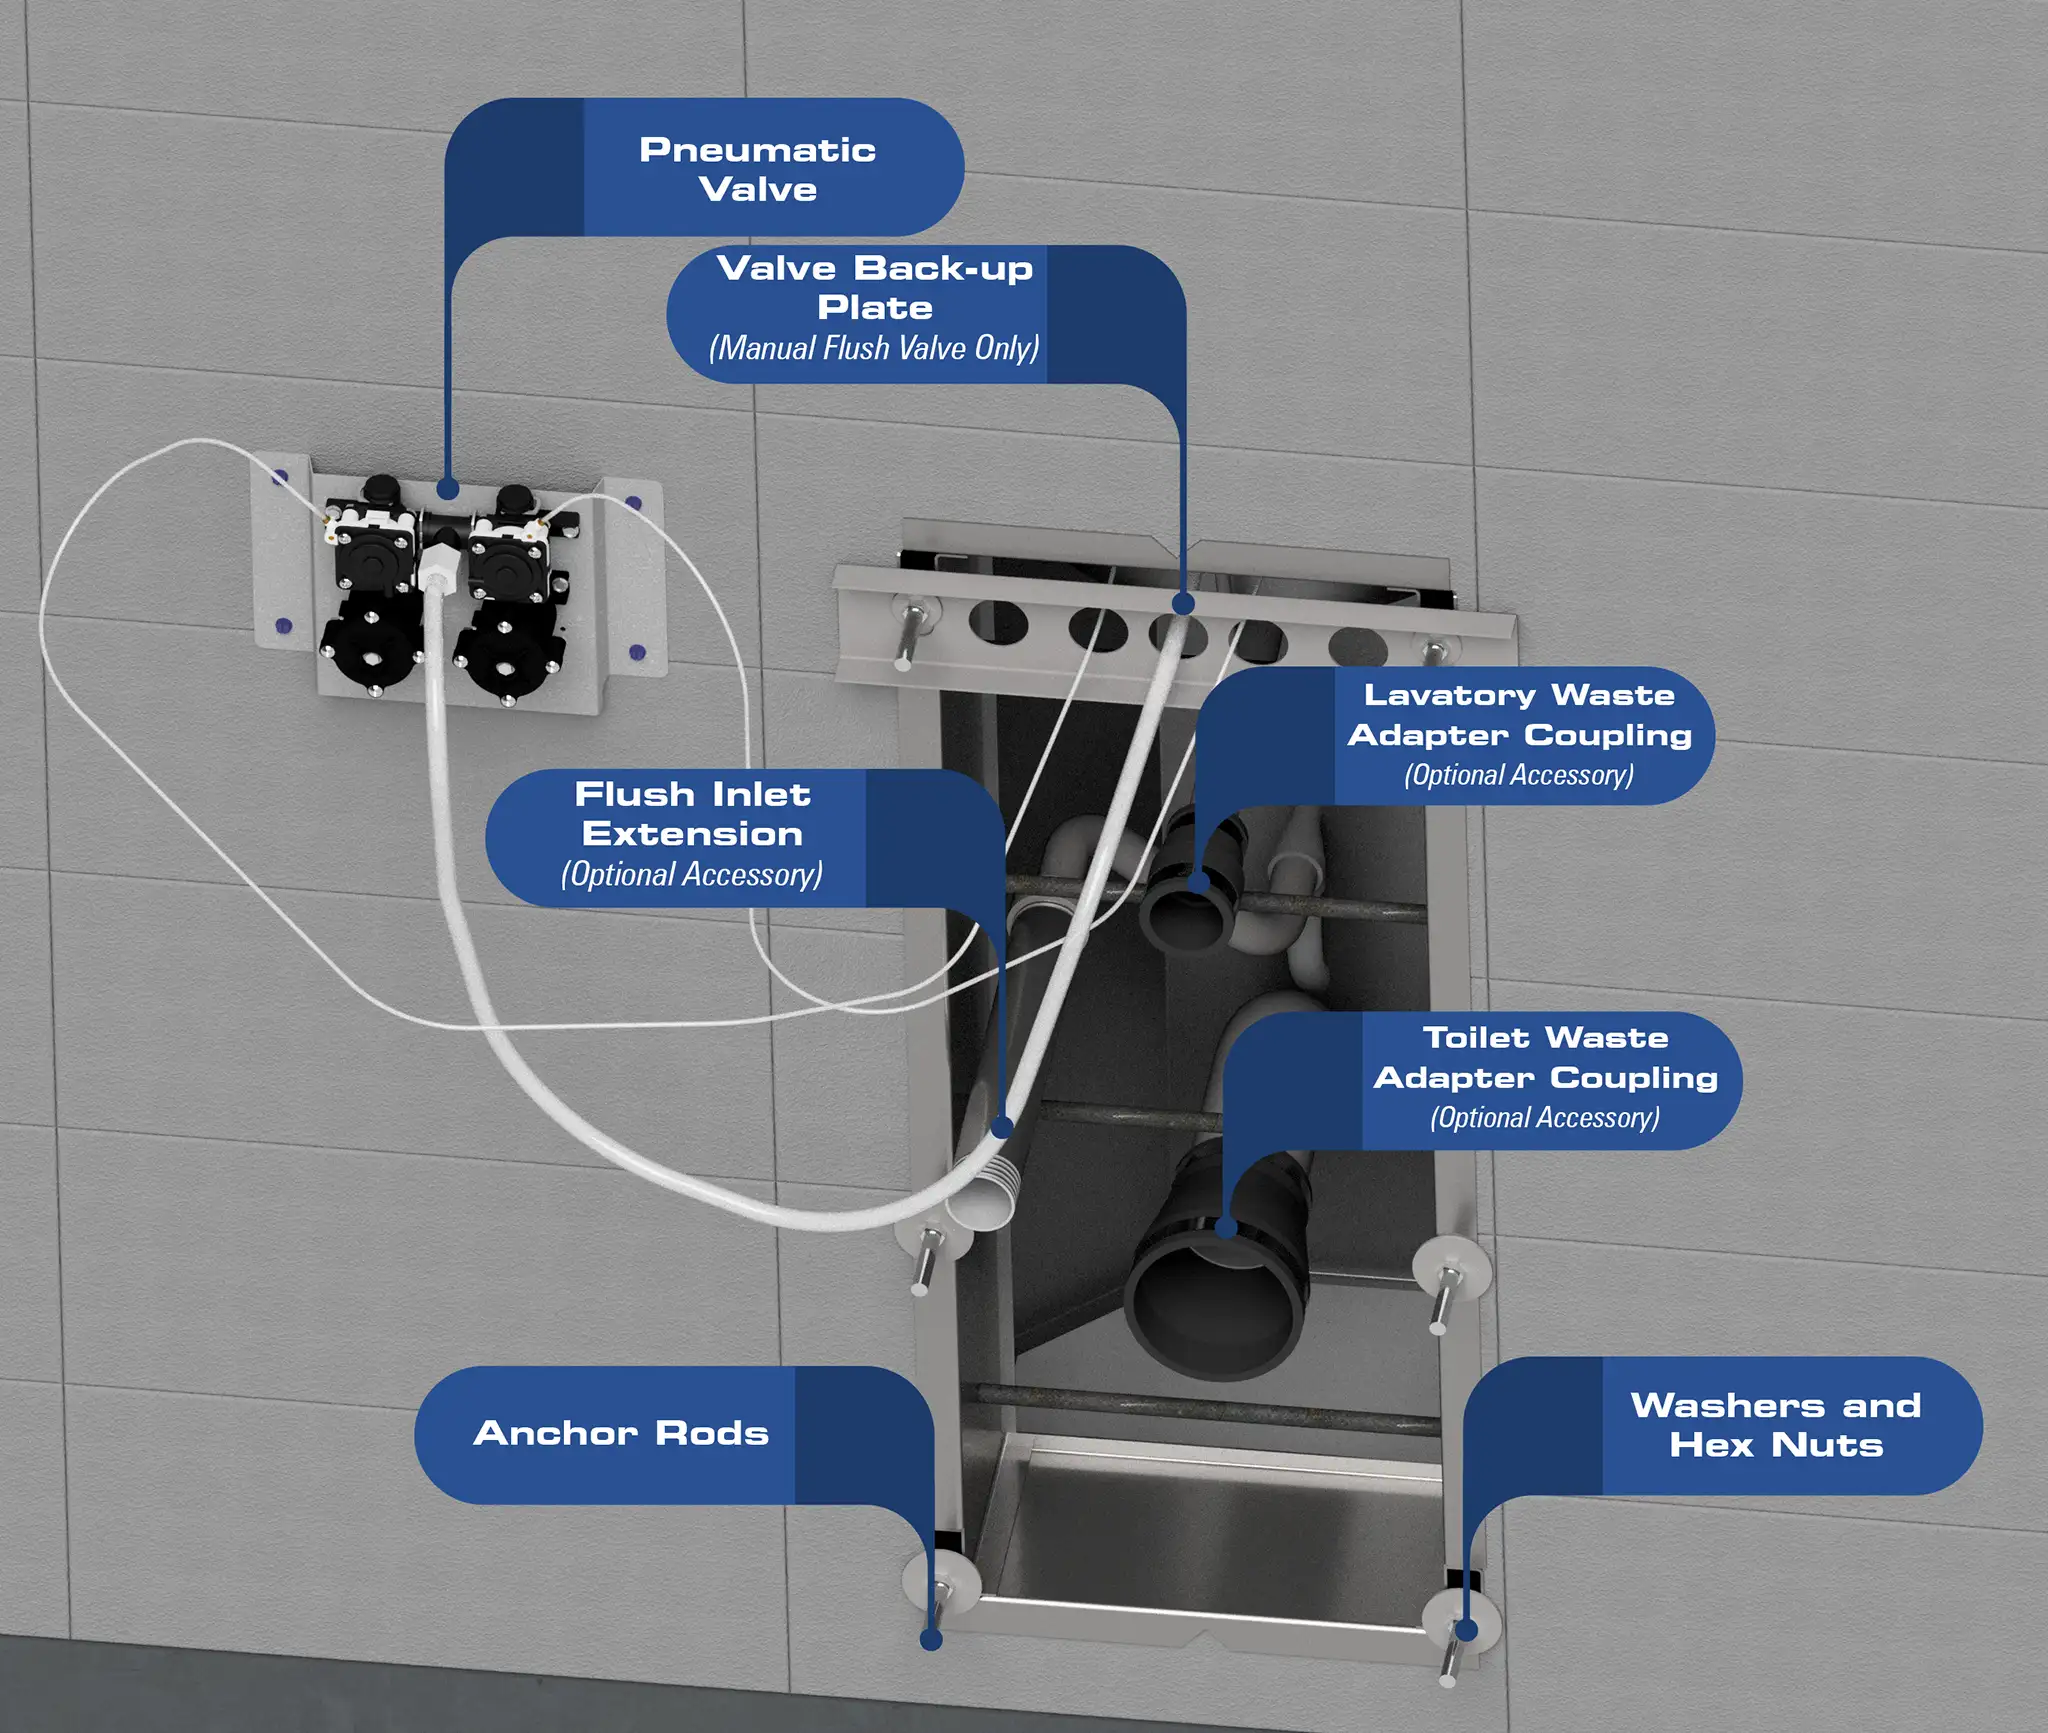
- Attach all backsplash trim including push buttons and bubbler.
- Attach anchor rods to fixture.
- Attach and plumb the fixture side of any extensions or couplings.
- Unit is now ready for final positioning.
From the chase side continue the installation process.
- If you’re using a manual button for your flush valve, secure the valve back-up plate.
- Secure the anchor rods with washers and hex nuts.
- Make final plumbing connections.